

Hello Peeps!
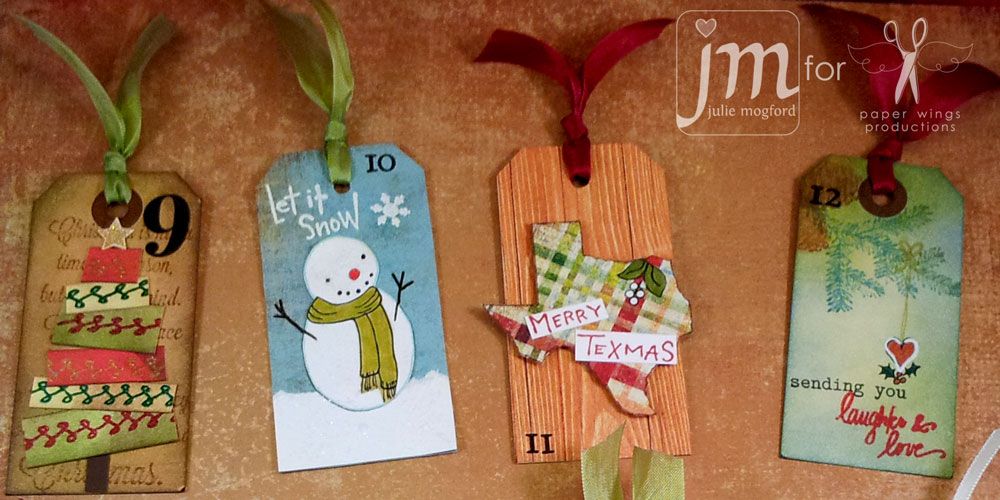
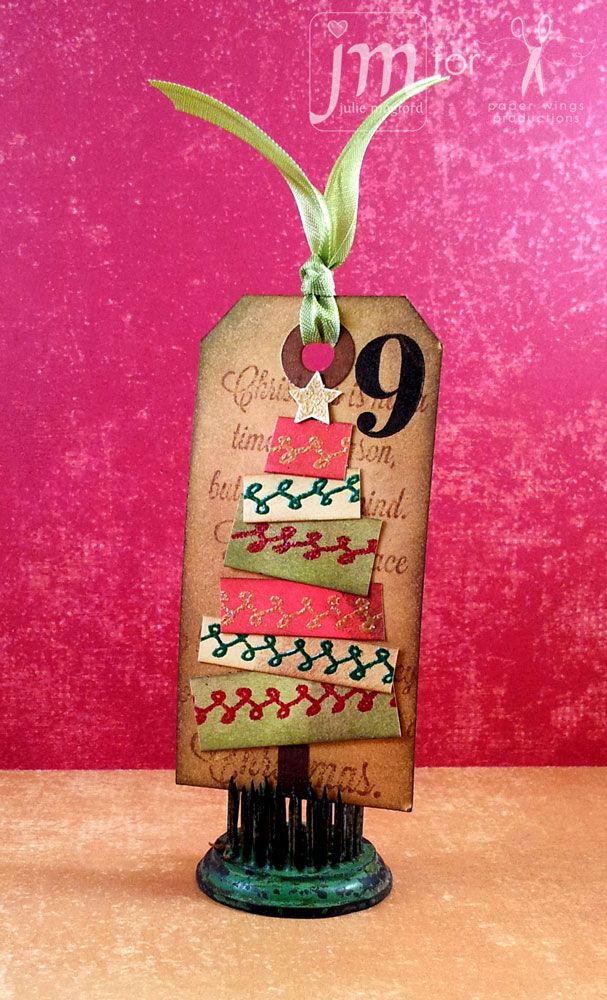
Welcome back to Part 2 of the Advent Calendar! Today I"m sharing tag 9-16. Since I used smaller tags for this project, I felt the smaller numbers from the Perfect Alphabet Clear set would be a better choice, and keep the focus on the image. The number 9 is from the Perfect Number Clear Set and all were stamped with Versa Fine Black Onyx. Let's take a look at them!!
I've been inspired by so many ideas on Pinterest, Splitcoast, and Online Card Classes Holiday Workshop. Here are today's tags!
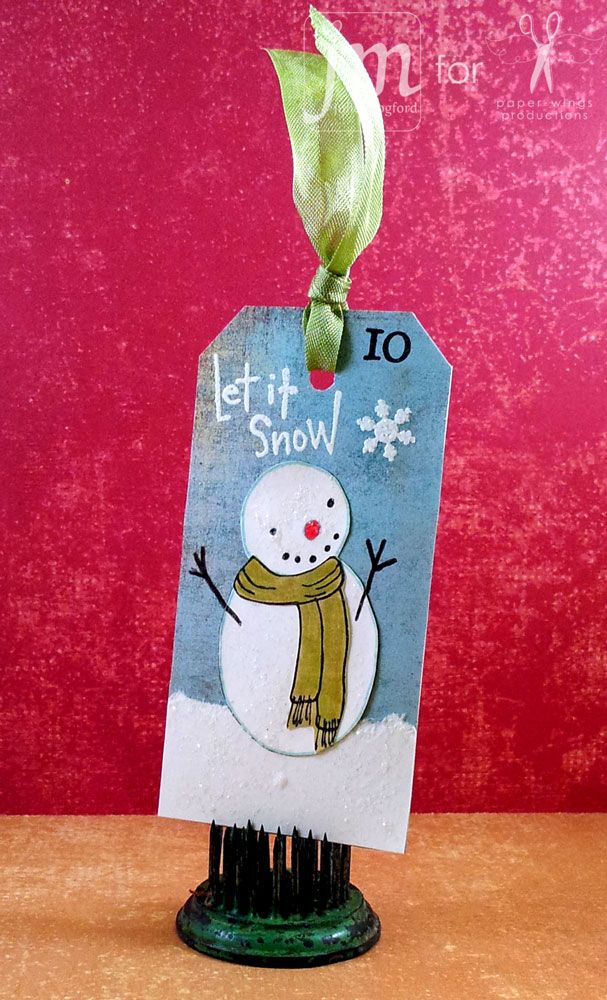
Details: Cardstock background (Basic Grey), white Neenah Cardstock with a torn edge added for snow and snowman from Snowman Love set and used the cute little scarf for this little guy. The Let it Snow was stamped to fit the space and embossed with Stampin' Up Whisper White ep. Since he was looking upward, I had to give him a little snowflake to watch from the Winter Mix It Up set. And of course, I couldn't resist a little Rock Candy Distress Stickles to make the snow sparkle.
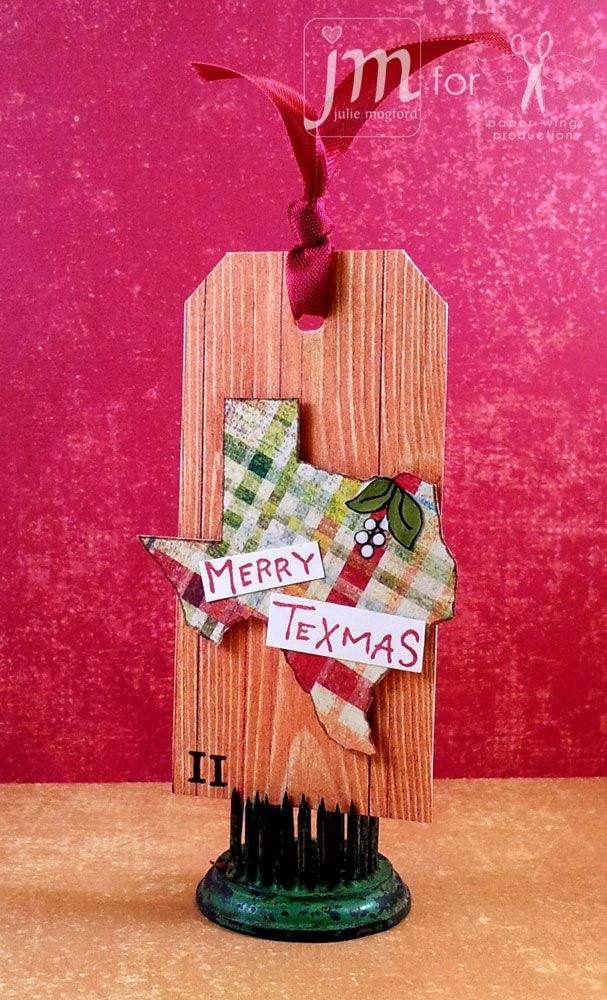
Details: I'm a Texas gal! So, I had to pay a little tribute to Texas! I used the Lone Star State clear stamp and stamped it on this cute Christmas plaid paper and cut it out. I added the cute Texmas sentiment in Festive Berries distress ink. And finally, a sweet little mistletoe from the Holiday Tags clear set. The woodgrain paper is from Studio Calico. Perfect!!
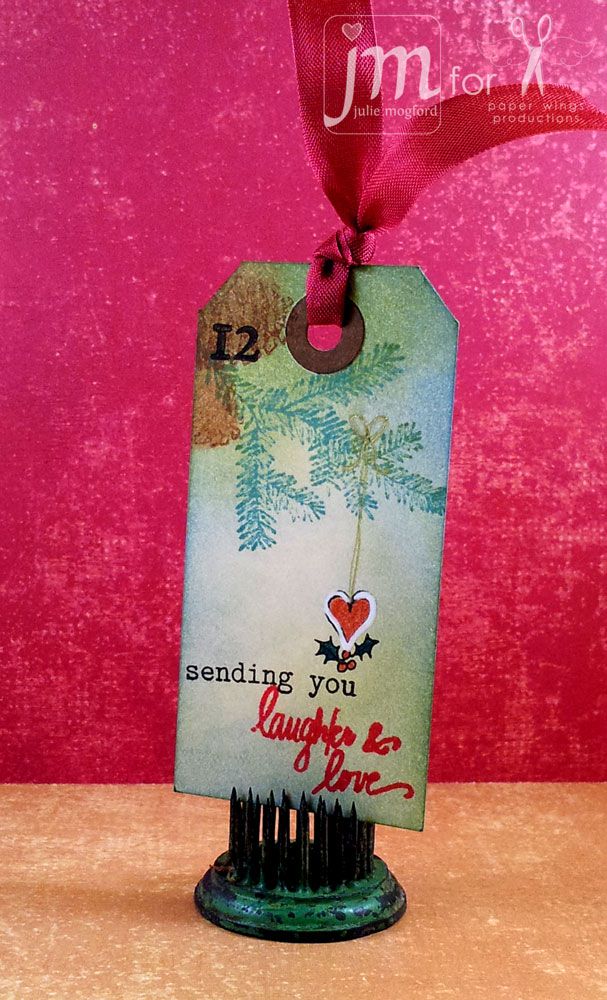
Details: I just love this pine bough and pine cones from the Pines Cling Stamp Set. I added another element from the Holiday Tags clear set to create an ornament. I drew the hanger and bow with a gold pen. And, I love this sentiment from the Winter Mix It Up set.
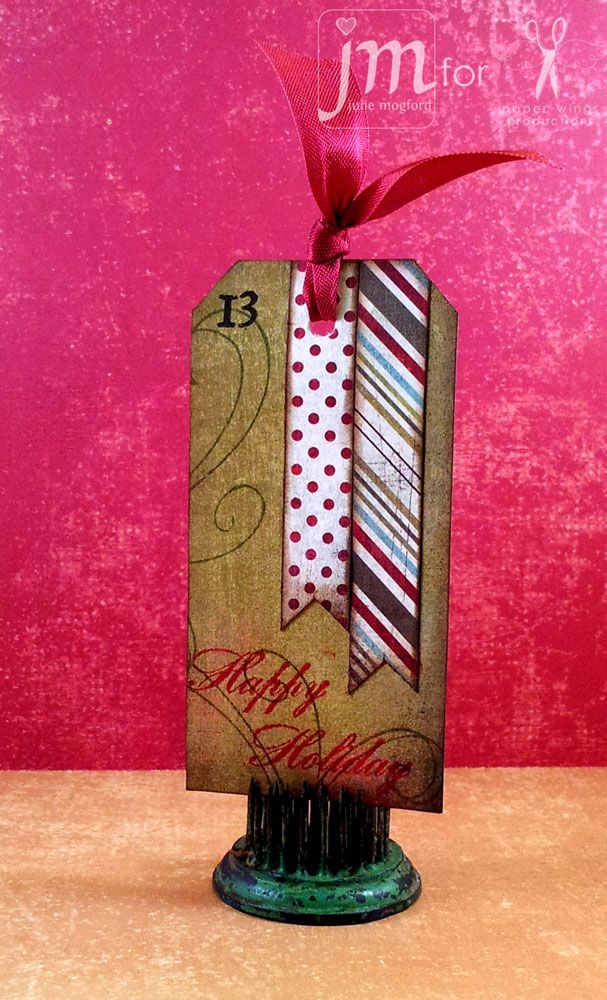
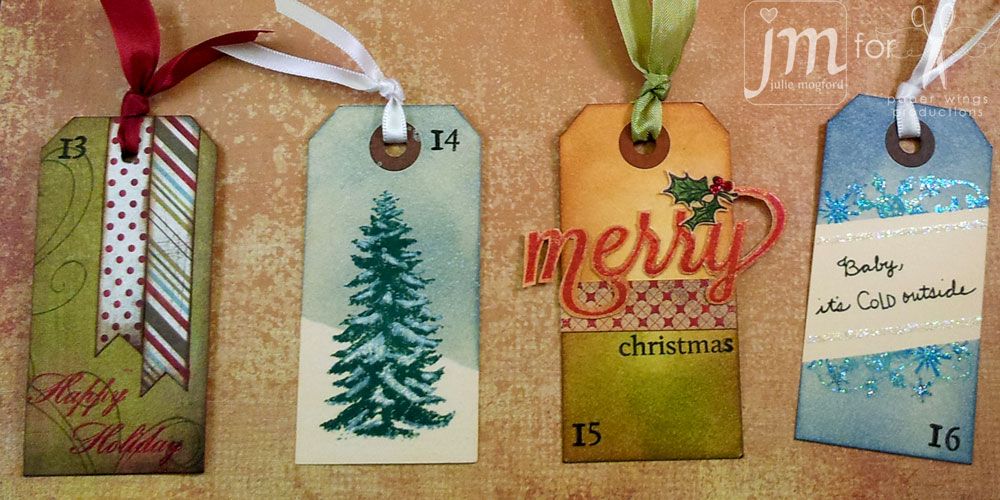
Details: Basic Grey green paper from Figgy is accented here with Flourish Fun 2 stamp and two more strips of BG Figgy paper. All edges are inked with Walnut Distress ink, and the Happy Holiday Script sentiment added and embossed in red! Simple and Elegant.

Details: This one took a little work, but I love how it turned out. The tag background is inked with two colors of Distress ink plus a little Walnut. I've added a strip of paper to separate the two areas and give it some interest. Then I used the Merry Clear stamp with Christmas in black, and merry stamped in Festive Berries on a separate brown inked tag. I embossed merry ink clear to give it a little shine, and then trimmed the sentiment to expose the background and have the letters hang off the side. The finishing touch is the holly berries and leaves from Holiday Tags stamped and colored with Distress markers, with a touch of Barn Door distress stickles. It feels classic and delicate.
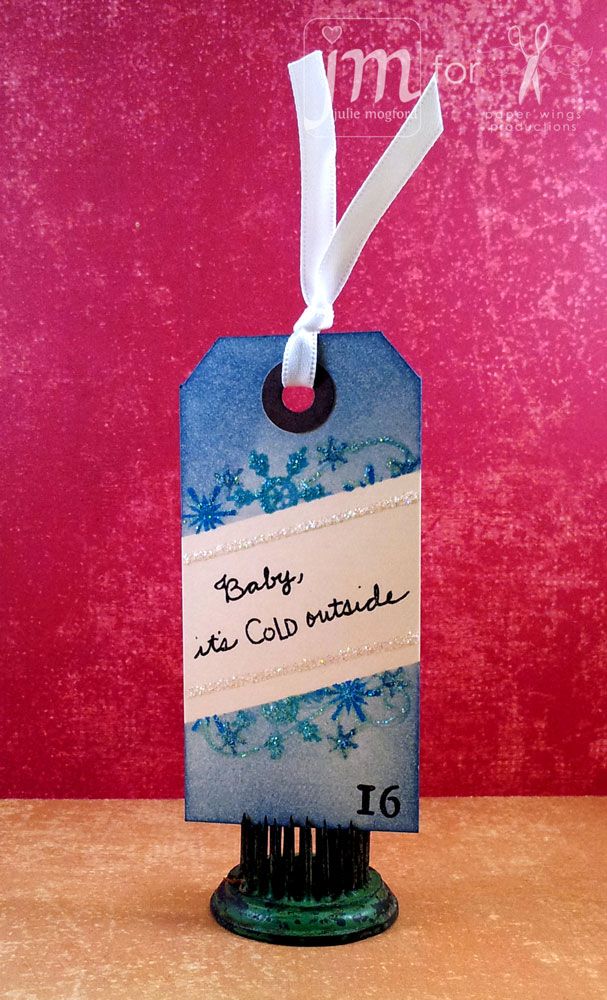
Details: I loved seeing this technique from Jennifer McGuire in the Online Card Classes Holiday Workshop. First I stamped the sentiment from Snowman Love and using a mask, I have sectioned off part of the tag and stamped a flourish and several snowflakes in a variety of blues along the edge. Using an ink blending tool, I shaded the exposed areas of the tag. And, to add that icy look, a touch of Diamond Stickles. I love how this one turned out! (Flourish Fun 2 , Holiday Mix It Up, and Winter Mix It Up for the snowflakes).
Lots of festive designs here for part 2 of our Advent Calendar. There will be one more
installment of the remaining tags before the end of the month. I hope you found something today (or several ideas) that will inspire you for your projects. As always, I'd love to see what you create!
Add your projects to our flickr group, to Pinterest, comment with a link on this post or even email pictures
to us! See you soon with the final set of tags.
"Deck the Halls!!!"
Happy Stamping!
Julie
Wow, Julie! It is amazing how varied and wonderful each of them is.
ReplyDeleteIt's been fun trying to see what else I can make :)
DeleteOmgeeeeeeee.......All of these were soooooo cute!!!!!!! Well done Ms. Julie!!!!!!
ReplyDeletethanks :) they were fun to make
DeleteThese are adorable Julie!
ReplyDelete